|
5th GRADE
|
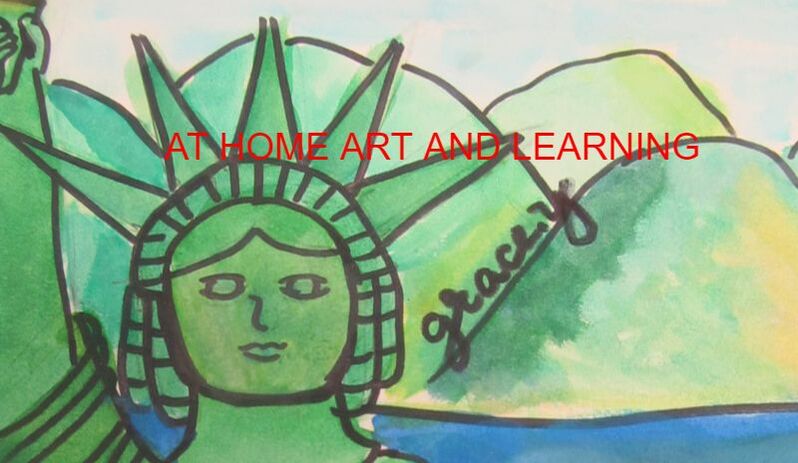
AT HOME ART AND LEARNING
Zentangles
The Zentangle Method is an easy-to-learn, relaxing, and fun way to create beautiful images by drawing structured patterns. We call these patterns, tangles. You create tangles with combinations of dots, lines, simple curves--- these simple shapes are the "Elemental Strokes" in all Zentangle art. Look at the steps below for some zentangle patterns. Notice that you start with simple lines or shapes and then "build" your design. As you concentrate on your design, you really relax and just pay attention to your art. This is why many people find creating zentangles to be very relaxing. You only need paper and something to draw with--- a pencil, a marker, a colored pencil--whatever you have. You can start a design and then work on it later---it is something you do not need to complete at one time. We have used zentagle designs in class for borders and they are great for that. They can be a work of art on their own. Some of the designs can easily turn into an OP art design. ( OP art often looks like it is moving or 3D ) Try some of the ideas below!!!
The Zentangle Method is an easy-to-learn, relaxing, and fun way to create beautiful images by drawing structured patterns. We call these patterns, tangles. You create tangles with combinations of dots, lines, simple curves--- these simple shapes are the "Elemental Strokes" in all Zentangle art. Look at the steps below for some zentangle patterns. Notice that you start with simple lines or shapes and then "build" your design. As you concentrate on your design, you really relax and just pay attention to your art. This is why many people find creating zentangles to be very relaxing. You only need paper and something to draw with--- a pencil, a marker, a colored pencil--whatever you have. You can start a design and then work on it later---it is something you do not need to complete at one time. We have used zentagle designs in class for borders and they are great for that. They can be a work of art on their own. Some of the designs can easily turn into an OP art design. ( OP art often looks like it is moving or 3D ) Try some of the ideas below!!!


LEARNING ABOUT POP ART APRIL 2020
As you explore the work of POP ARTIST Jim Dine below--- this is a good time to review some facts about the POP ART movement. Read the information here and continue, or begin, to work on your own Jim Dine inspired Pop Art Heart.
The concept of pop art began in the 1950s and the basic thing which makes this type of art different is the use of bold images that are painted in bright colors. It is a type of art that is described as a depiction of everyday items in bold colors. The pop artists have created images using things like the packaging of ketchup bottles, soup cans, hearts, product labels, comic strips and photos of celebrities.
Here are some facts about pop art:
- Popular art or pop art is a movement that started in the 1950s and 1960s.
- This movement was basically a reaction against traditional art
- Pop art involves usage of everyday objects for the creation of art pieces.
- Andy Warhol is considered to be the most famous pop artist. He is known for his paintings of soup cans.
- Another well-known artist of pop art is Roy Lichtenstein. The unique feature of his paintings is that they look like a comic strip.
- There is an art type which is quite similar to the pop art. The name of this art is Op art that uses optical illusions to trick the eyes of a viewer.
POST 3 Pop Artist --- Jim Dine is an American artist who was part of the POP art movement in the 1960's.
WHAT IS POP ART? ... Pop art is a style of art based on simple, bold images of everyday items, such as soup cans, painted in bright colors. Pop artists created pictures of consumer product labels and packaging, photos of celebrities, comic strips, animals and everyday objects. Jim Dine is known for the variety of heart paintings that he did. When you closely look at his paintings you realize that his hearts have meaning. As simple as the well-known heart-shape is, Dine's heart paintings are not nearly as simple, expressing emotions and causing the viewer to think about ideas, situations and feelings. Take some time to look at the paintings below, what do they mean to you. Artists often make us think about ourselves, other people and the world around us.
WHAT IS POP ART? ... Pop art is a style of art based on simple, bold images of everyday items, such as soup cans, painted in bright colors. Pop artists created pictures of consumer product labels and packaging, photos of celebrities, comic strips, animals and everyday objects. Jim Dine is known for the variety of heart paintings that he did. When you closely look at his paintings you realize that his hearts have meaning. As simple as the well-known heart-shape is, Dine's heart paintings are not nearly as simple, expressing emotions and causing the viewer to think about ideas, situations and feelings. Take some time to look at the paintings below, what do they mean to you. Artists often make us think about ourselves, other people and the world around us.


After spending some time looking at the above paintings, think about creating your own painting of a heart or hearts that has meaning. Think about yourself, family, school. community, friends, activities you enjoy--- and using the heart symbol create a drawing or painting. This is an open-ended project. There is no right or wrong idea. You should just use the POP art heart to express yourself. You should write an artist statement ( a sentence or several sentences or phrases about your art) as part of your art, it could be written around the border or inside a heart or it could be on the back of your art. Please use any art materials or papers you have available. This could be a collage, drawing , crayon drawing or painting. To create a symmetrical (same on both sides) heart pattern--remember to draw half of a heart on a folded paper and cut it out. In this project your heart might be asymmetrical (not the same on both sides). I am always impressed by the creativity students show completing this activity. Please email me a copy of your work. Also , if you have any questions or thoughts to share, email me!
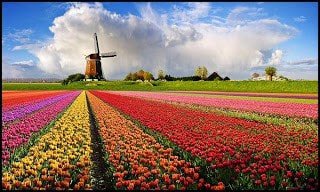
One Point Perspective Tulip Fields
Materials---ruler, paper, drawing pencil or marker, crayons, colored pencils, markers, paints
Look at the image of the tulip fields.
Draw a straight horizon line across the top of your paper about 1/4 of the way down.
At the top you will draw a scene in the distance--suggestions: windmill, simple buildings, trees. hills
You can color these one color to create a silhouette or outline. Another choice is to color with detail---you decide.
In the middle of the horizon line draw a dot, this is your vanishing point. The vanishing point can be moved to one side but all lines must go to it---look at the samples below.
At the bottom of the paper mark off dots, these represent the beginning of each row, you will use the dots to draw lines with your ruler to the vanishing point. This will create the rows of tulips.
You can color the flowers by making shapes close to the bottom of the paper that gradually get smaller as you near the vanishing point.
Another option to create perspective is to make the color lighter at the bottom of the paper and change the VALUE to darker towards the vanishing point.
Look at the examples below for inspiration. Create your own one point perspective---remember to use the ruler and email me a photo of your work. Use supplies you have available---this can be a pencil sketch, painting, oil pastel drawing---experiment and use what you have!!!!!!!


One point perspective is a type of linear perspective.
One point perspective is a system to assist in realistically showing a three-dimensional scene on a two-dimensional (flat) surface by using lines which come together at one point (known as a vanishing point). When an object gets farther away from you, it appears smaller. One point perspective is a simple way of determining the relative size of that object as it vanishes or disappears into the distance.
The video below is similar to the way we began to draw our aquarium in some of the fifth grade classes.
Please do this at home: Remember you have to use a ruler to get clean, sharp lines.
Below are examples of our work in progress.
You need a ruler, paper and pencil or marker to draw.
Remember to start with the vanishing point close to the center of the paper (dot).
Afterwards, you may want to try another type of one point perspective, like a road that disappears to the vanishing point.
Email me and send photos of your completed work if you like! I would love to see it----include your name and class code.
https://www.youtube.com/watch?v=-5UIVwAZink


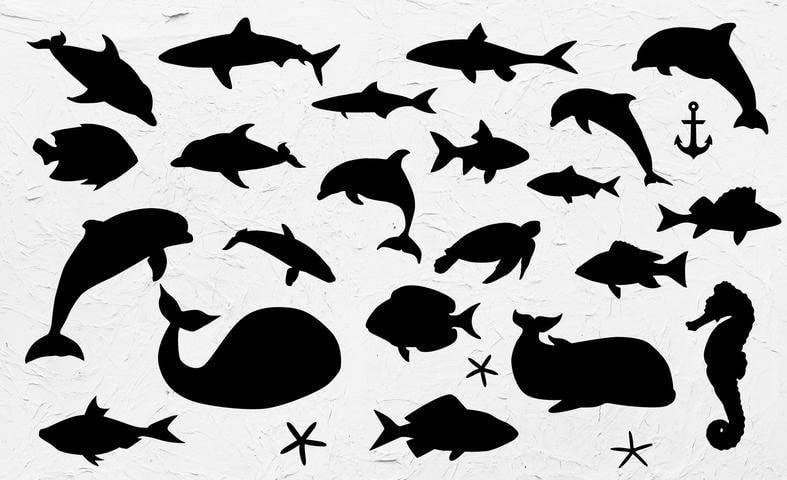
under the sea ideas
