|
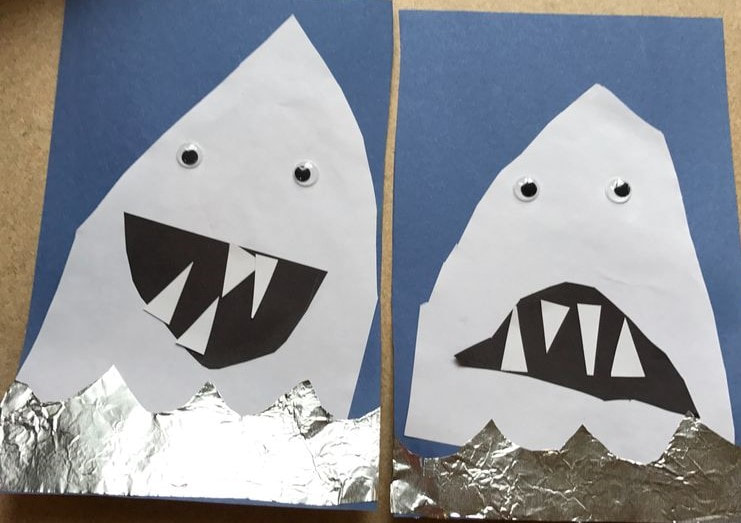
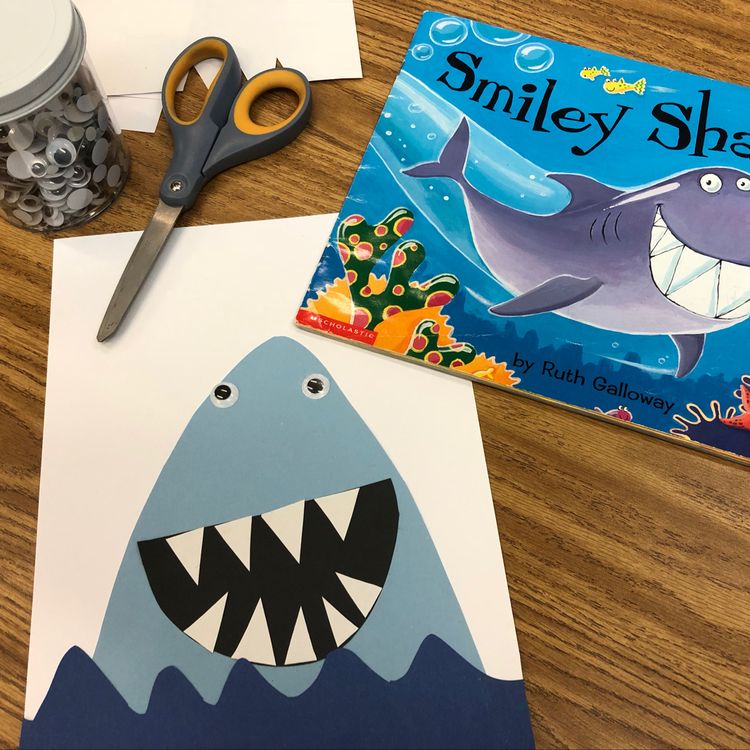
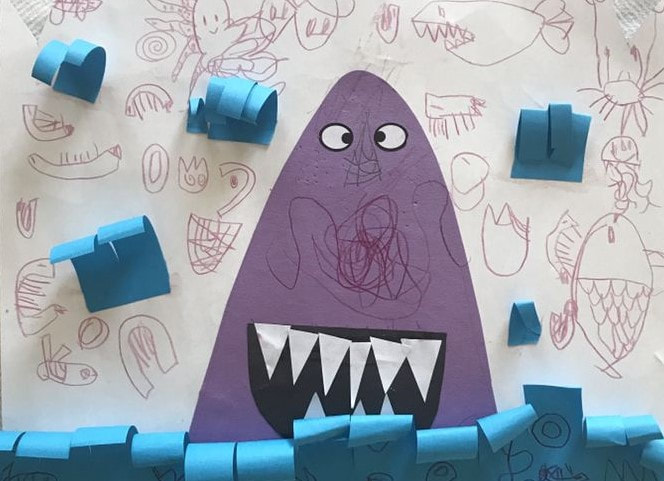
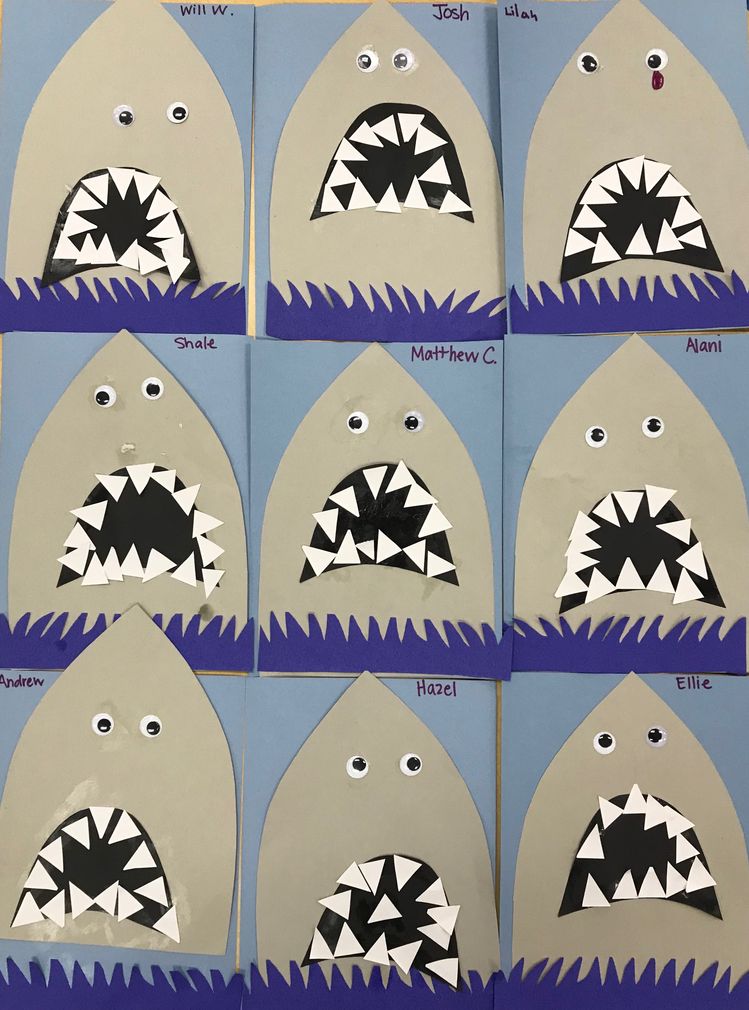
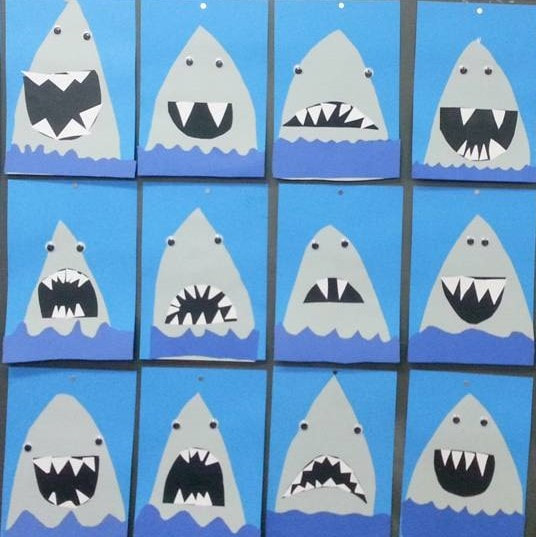
This is a story with great illustrations of a shark and other under the sea friends. After you look at the story you can create your own smiley shark with a few simple supplies. You can draw the shark with simple shapes, you can cut out the shape of the shark and glue pieces of paper on the shark. You can use recycled supplies like magazines, newspaper and wrapping paper. You can do any combination of these things. You can create water with construction paper, aluminum foil, paint or crayons. The smiley teeth are the most fun and you will want to use the TRIANGLE shape to create those. To draw our triangle we go up the mountain to a point and then down the mountain. We use the same directions to cut out triangles!
|
SMILEY SHARK
|

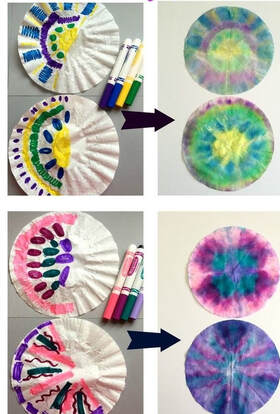
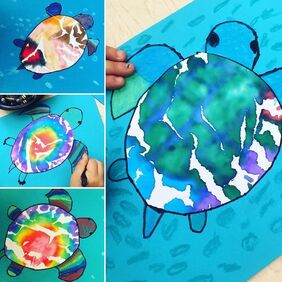
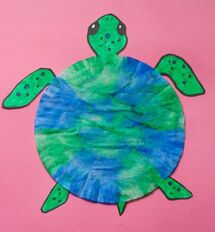
COFFEE FILTER ART WE had so much fun earlier this year drawing on coffee filters with water-based markers (like crayola) and then spraying with water to create a tie-dye design. Different colors and different designs give different results. The water spreads on the coffee filter so don't add too much! You need to cover the surface below the coffee filter when you color and when you spray as the colors bleed through the thin paper. After the paper is dry there are so many things you can turn your paper into--a flower, a butterfly, a hot air balloon and see the idea here to create a turtle with simple shapes. This is a great outside project as it can get messy!!! |
|

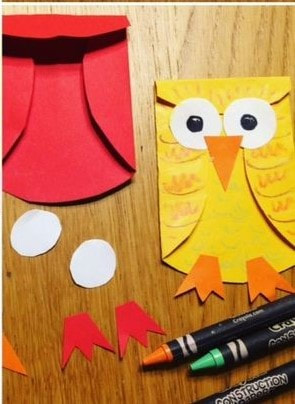
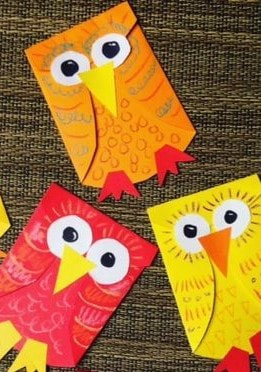
OWL FUN April 20
Materials: Paper, circle tracer (a lid or any circle you can trace), crayons or markers, scissors, glue or tape
This is a fun owl which involves using some of our art skills and creativity.
1. Find a circle you can trace.
2. Trace and cut out your circle.
3. Fold the the 2 sides of the circle in to form the wings.
4. Fold the top down to form the head. (look at the picture of the folds)
5. You can glue or tape the folds down.
6. Use some paper to cut out circle eyes (you can look for a circle to trace) and a triangle beak. Then glue or tape them in place.
7. Have fun drawing your details on your owl. Use all kinds of lines and shapes. Think about making the tummy of the owl a different pattern (arrangement of lines or shapes) than the wings.
8. Add more details--cut out triangles for the feet. Glue your owl to a piece of paper and draw a branch for him to sit on. Make a family of owls--use your imagination and have fun!
|
Pinch Pot Review April 13
Look at the photos to review the steps to create a pinch pot. You can do this at home with store play-dough or a homemade play-dough. 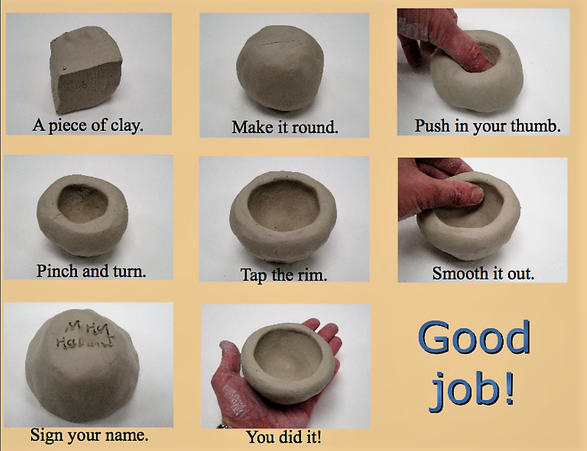
|
"We always start by squeezing the clay and getting any air bubbles out, then form a clay ball. Push your thumb into the center but make sure you do not push through the bottom of the pot. Using your "pincher" fingers start to go around the pot
and continue as you make the sides of the pot even in thickness. This project uses fine motor skills and you can make a whole group of pinch pots. You can decorate the outside of the pinch pot by pressing a pencil, toothpick, marker lid or any small object into the clay. Have fun and experiment! 
|
|
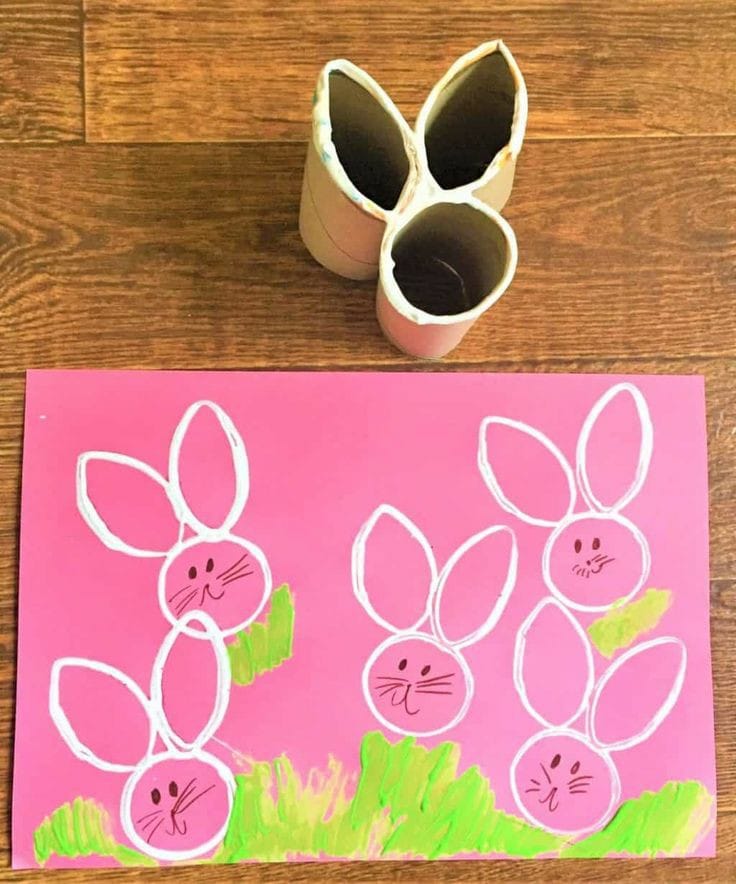
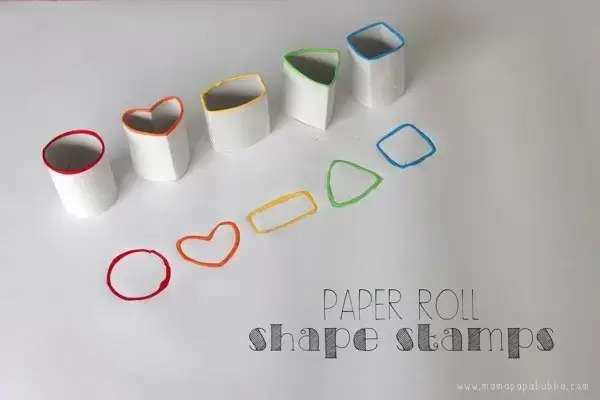
Simple printing/stamping -- Post 3
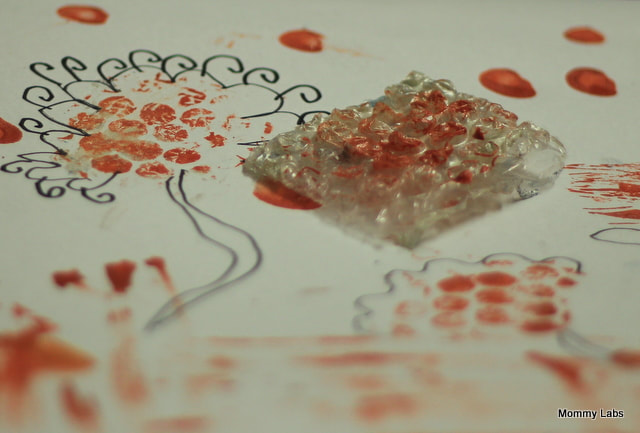
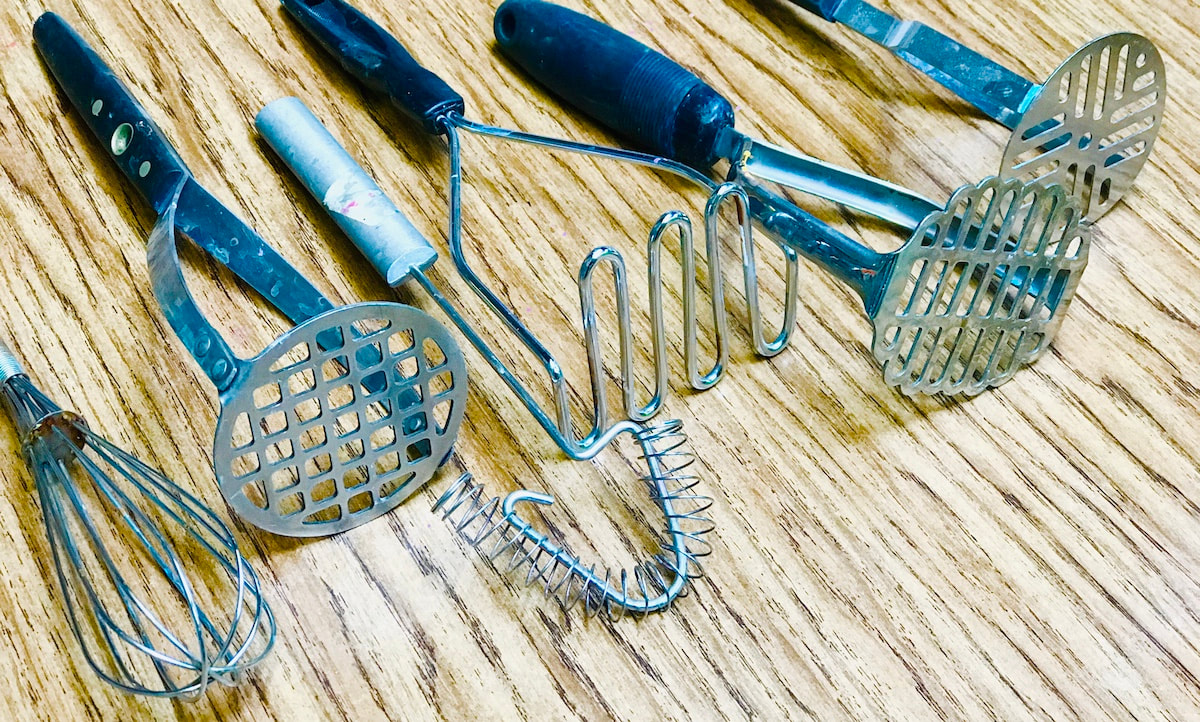
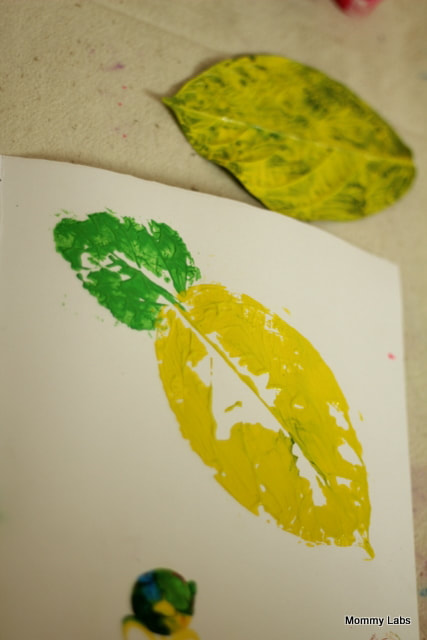
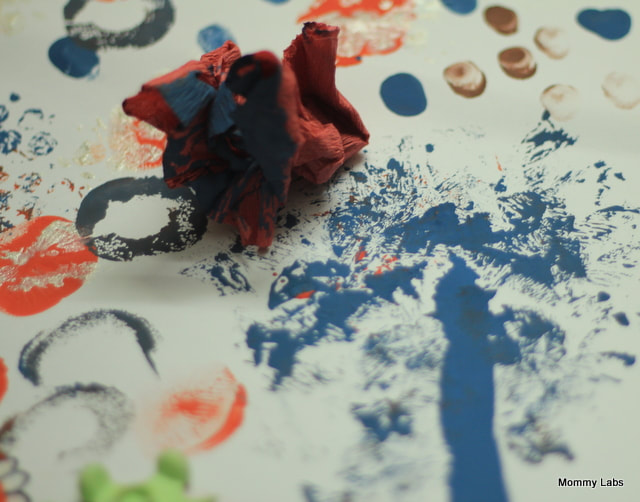
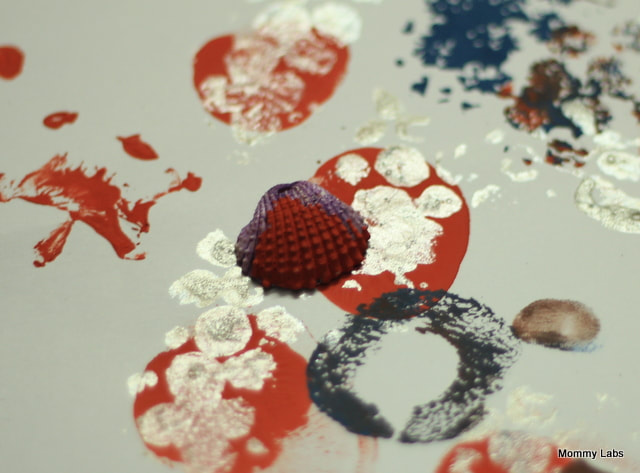
Printing/stamping is a fun way to create art. There are so many open-ended possibilities! You will need some paint. Tempera paint that has some thickness to it is the best but experiment with what you have on hand. Spread your paint on a flat surface--a paper plate, piece of paper, foil, old plastic lid, etc. Using paper rolls to create shapes is a good place to start. Look at the bunnies above created by taping 3 rolls together. Manipulating materials to print with and determining placement are all activities which focus on fine motor and creative skills. Look around your house for interesting items that you can use and assemble some choices together before you start. Below, you see bubble wrap, kitchen utensils, leaves, paper rolls, and even wads of papers used to stamp and print. Focus on the process with this and experimentation. Try this numerous times and on a variety of papers you may have on hand. You can take completed prints and cut them up and assemble in a collage--so many possibilities! Most of all, have fun and try something new! This activity helps students understand that there are a variety of ways to create art with everyday materials, Try playing music as you create---this is something many famous artists like KANDINSKY did!
Printing/stamping is a fun way to create art. There are so many open-ended possibilities! You will need some paint. Tempera paint that has some thickness to it is the best but experiment with what you have on hand. Spread your paint on a flat surface--a paper plate, piece of paper, foil, old plastic lid, etc. Using paper rolls to create shapes is a good place to start. Look at the bunnies above created by taping 3 rolls together. Manipulating materials to print with and determining placement are all activities which focus on fine motor and creative skills. Look around your house for interesting items that you can use and assemble some choices together before you start. Below, you see bubble wrap, kitchen utensils, leaves, paper rolls, and even wads of papers used to stamp and print. Focus on the process with this and experimentation. Try this numerous times and on a variety of papers you may have on hand. You can take completed prints and cut them up and assemble in a collage--so many possibilities! Most of all, have fun and try something new! This activity helps students understand that there are a variety of ways to create art with everyday materials, Try playing music as you create---this is something many famous artists like KANDINSKY did!

AT HOME LEARNING (Post 2)
(Image from Creative Call Morocco).
Use a piece of paper and a crayon — take the wrapper off the crayon to create your rubbing. Remember to use your pincher fingers to hold the crayon from the side in order to rub with your crayon. It is fun to use more than one color! Some ideas include using different colors to fill in different sections of your paper. Use greens for grass, blues for rivers and oranges for sunsets. It would be fun to rub a rainbow!
Another activity to try is placing a piece of paper on top of an object, then use the side of the crayon to create a rubbing. You can experiment with a variety of things----look for leaves outside and anything else that has an interesting texture like the bark on a tree.
Place a piece of paper on top of the object, and then use the side of the crayon to create your rubbing.
Experiment with different colors and textures on the same piece of paper. Have fun and try this more than once! You could store your “rubbing crayons” in a Ziploc bag to use over again!
The High Museum has more about rubbings on their website https://medium.com/high-museum-of-art/get-creative-at-home-make-colorful-rubbings-from-cool-textures-5d3ee9792ddb
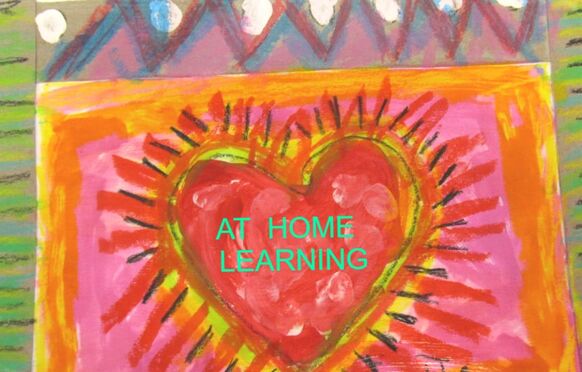
AT HOME LEARNING (Post One)
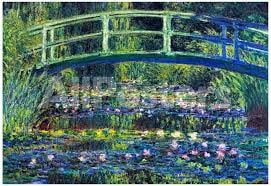
Kindergarten students recently painted water showing movement using a variety of lines as we looked at Monet's garden. This will be a great opportunity to practice and review!
The lines included zigzag, bumpy, wavy and spirals. It is fun to draw or paint lines.
Students can experiment at home and also use overlapping.
We used cool colors including, purples and blues plus greens can be added.
Students can work at home with crayons, paints or colored pencils.
They can use simple shapes to draw the bridge and water lily flowers if they want to add more detail. Tissue paper would also make great water lilies.
This is a video about a girl, Linnea, who visits Monet's garden.
https://www.youtube.com/watch?v=IZHO5KZUX1M&t=1418s
a and a virtual tour of monet's garden: https://www.youtube.com/watch?v=mzlD-J3B9Xg
